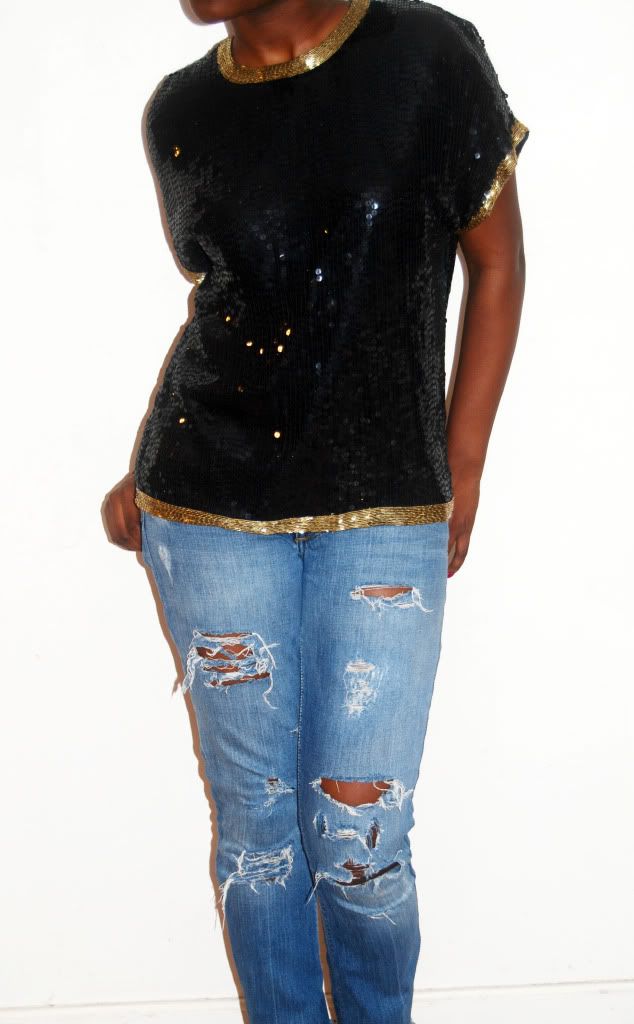
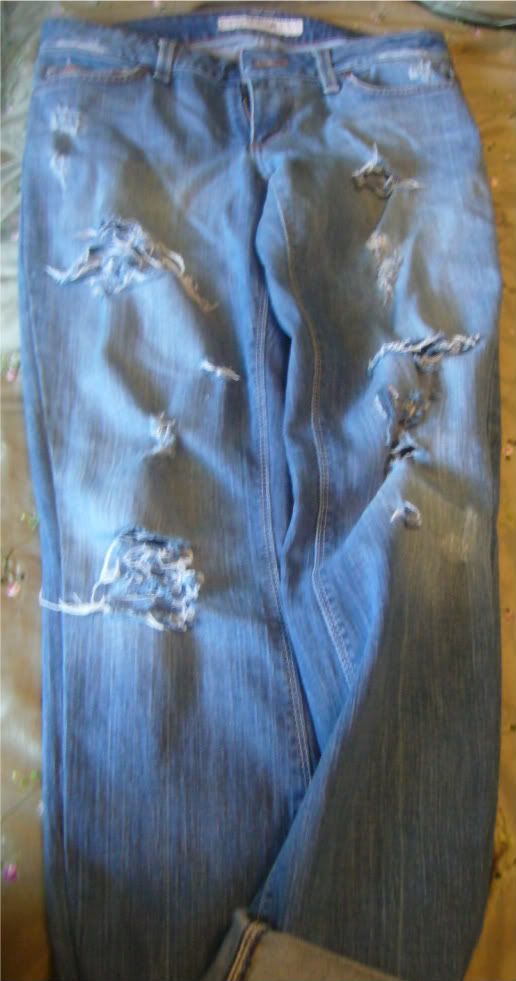
DeContructed - Pearl Bow Flats

posted under by DeConstructed Vintage
I was in desperate need of some casual flats a few months ago but the few mediocre pairs I came across while shopping weren't hot enough to shell my little pennies on.
So I brought some cheap 10 dollar flats...
and went digging in my good ol' rummage box...and found a vintage leather skirt that would serve as the perfect material for my bow on the front of my shoe....

I cut four rectangular leather strips (two for each shoe)

Glued them together

Found some old pearls and crystal beads and strung them together

Sewed them onto the bow

Sewed the bow onto the show and Viola!

My pockets are happy and so are my feet!

A DeConstructed Resolution...

posted under by DeConstructed Vintage
I've been away for way too long...but I've resolved to tone down the procrastinator and laziness in me (ain't giving it up entirely :-) so hope fully the vintage blogging will commence.

More vintage inspiration...
More DYI (for my broke-phi-broke sistren)
More DeConstructed vintage items...

But no matter how lazy I am, the Etsy store is always up and running!

Yes, I got my vintage itch back...stay tuned for new stuff :-)

New Items: Preview

posted under by DeConstructed Vintage
New Items!

Look for them in the ebay and etsy store!

Pink and Black Body Dress


Black Sequin Romper


Pink Blazer Romper

Silk Floral Top


Silk Flower Top


Black and White Sequin Tux Top

Colbolt blue seqin dress

Gold and black sequin top


Silk Bronze Jumper

DeConstructed: DIY Jumper

posted under by DeConstructed Vintage
I found this 1970's vintage pant suit jumper at a local vintage store but the legs of pant were way to short.

Before


So I decided to cut the legs off for the perfect short jumper.

After


Here's you'll need to complete the project:
  • Scissors
  • Needle
  • Thread
  • Double stick permanent tape

  1. Cut the pants to the length that suits you (allow enough room so you can fold the pants a couple of time)
  2. Iron on the adhesive tape, remove the backing and fold over the material

3. Stitch the last fold and the material of the body suit together and viola!

New Items: Preview

posted under by DeConstructed Vintage
New Items!

Look for them in the ebay and etsy store

Accessories/ Bags

Vintage CoachI love this bag, 100% leather
clutch, 100% snake skin/ leather
chunky gold necklace

faux croc oversize envelope clutch
Clothes
Burgundy pleated dress
80's Graphic Print Jacket
80's Graphic Print Shirt

1970's 100% Silk Dress
1970's Blazer

DeConstructed Vintage Inspiration

posted under by DeConstructed Vintage
I always love to search magazines, sites, even people watch for ideas when searching for vintage.

Gimme it all, in any size please...

Black.Leather. Tight. Sheer


Shoes. Animal Print Caftan. Detailed Swimsuit

Monotone colors. Similar palettes. Play on texture

Pleat/Pucker/ Folding detail. Strong shoulders. Neutral Colors

One shoulder. Airy material

DIY: Skinny Distressed Jeans

posted under by DeConstructed Vintage
Before


Found these old boot cut Joe jeans and decided to make them into skinny distressed jeans. It took me about 2 hours to complete and it's easier than I thought (with exception of the sandpaper part.)

What you'll need:
1. Jeans
2. needles
3. Sandpaper (heavy grit preferable)
4. Scissors
5. Sewing machine (to turn the jeans in to skinny leg of course)
6. Washing machine

Step 1: To make the skinny leg, align the jeans with a comparable pair of skinny's you already own. This will ensure the proper fit without all the guess work.

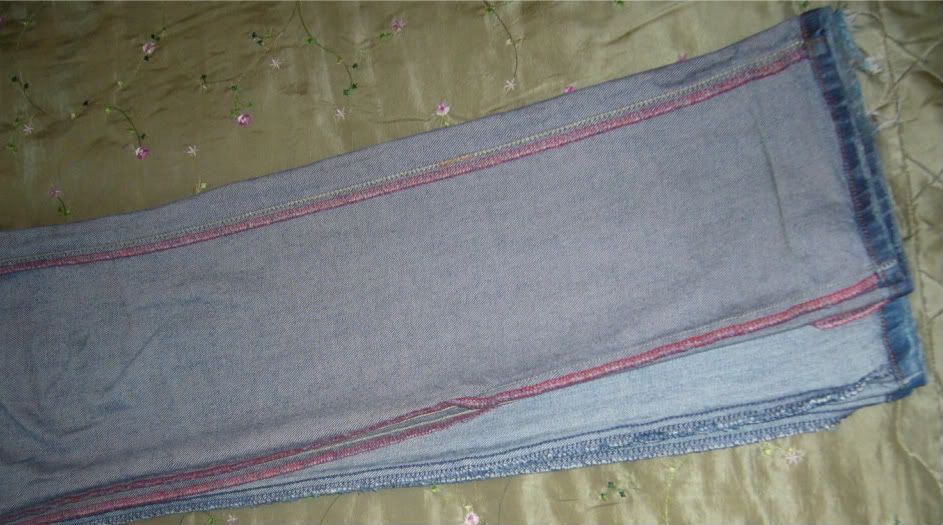
I took an old pair of express skinny jeans, turned them both inside out and aligned them together. The extra material left on the original jeans is what you'll be cutting.

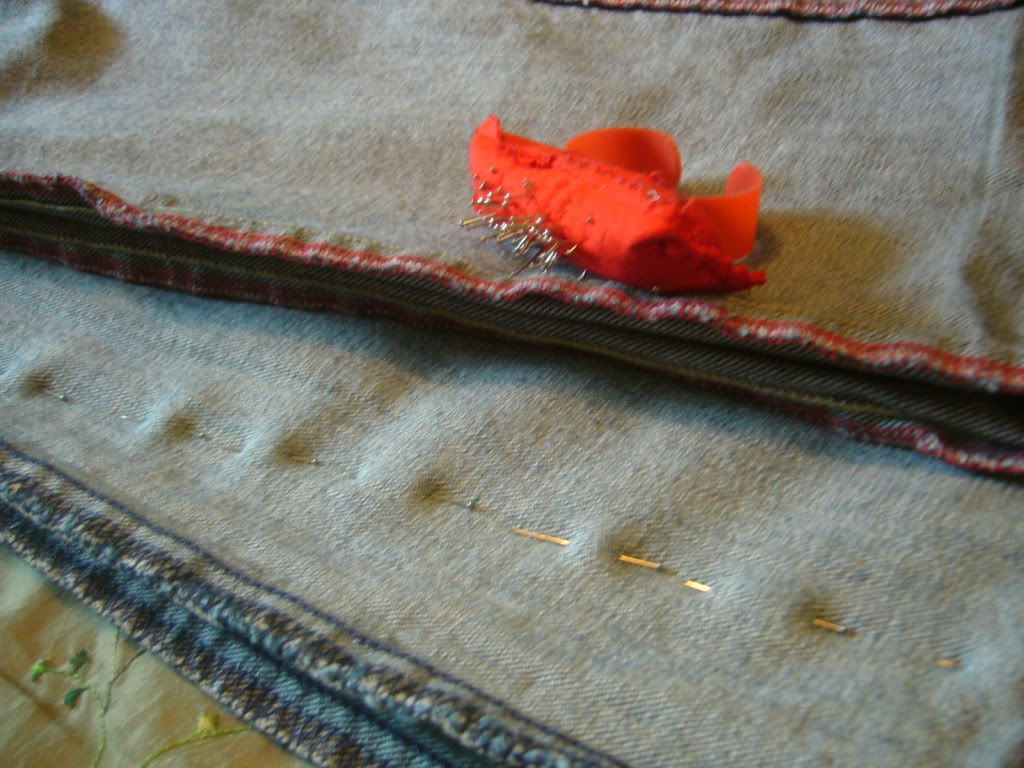
Step 2: Pin where the jeans match up. Meaning, pin where the excess material shows on the jeans your altering.
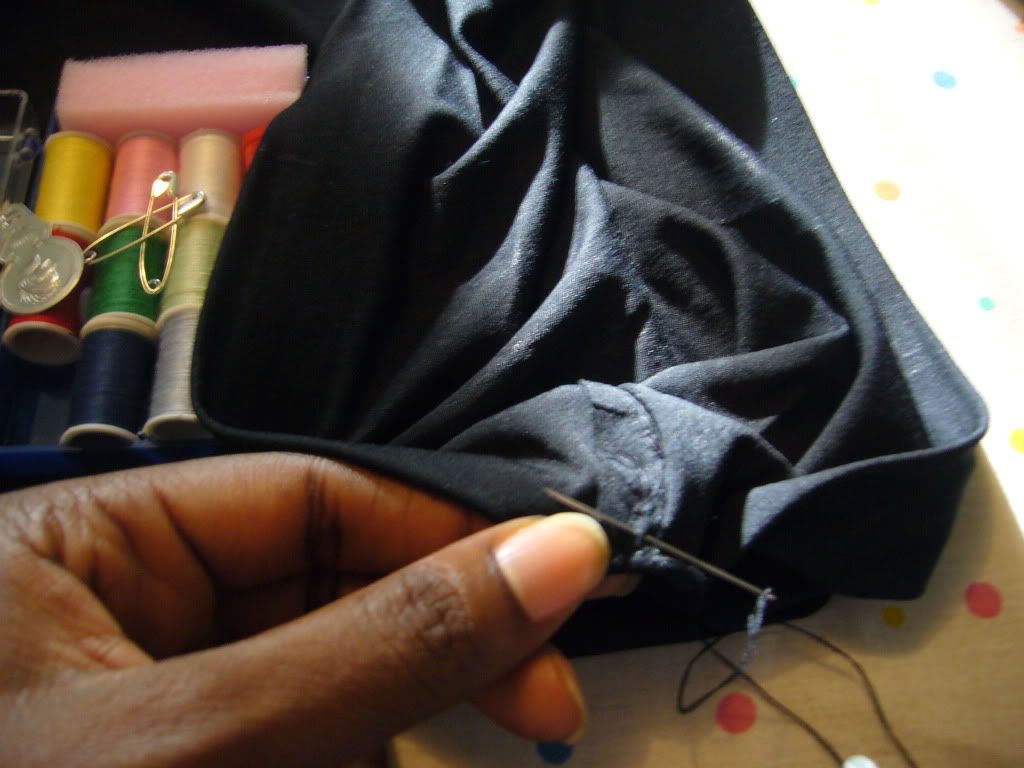

Step 4: Begin cutting outside (about 1/4 inch) where you placed your pins to get rid of the extra material and then begin sewing.


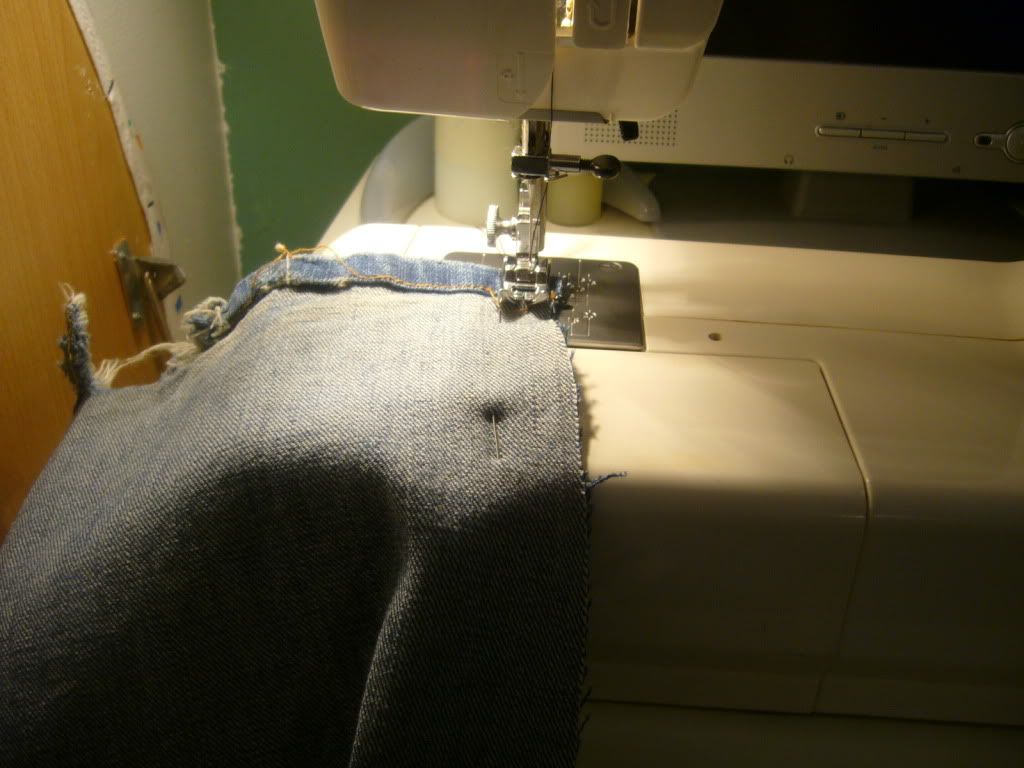
Had it not been for my stupid sewing machine that kept jamming, I probably would have been done with this portion in 10 minutes.

Step 5: Now here's probably the most time consuming part (if you don't have a stupid sewing machine that 
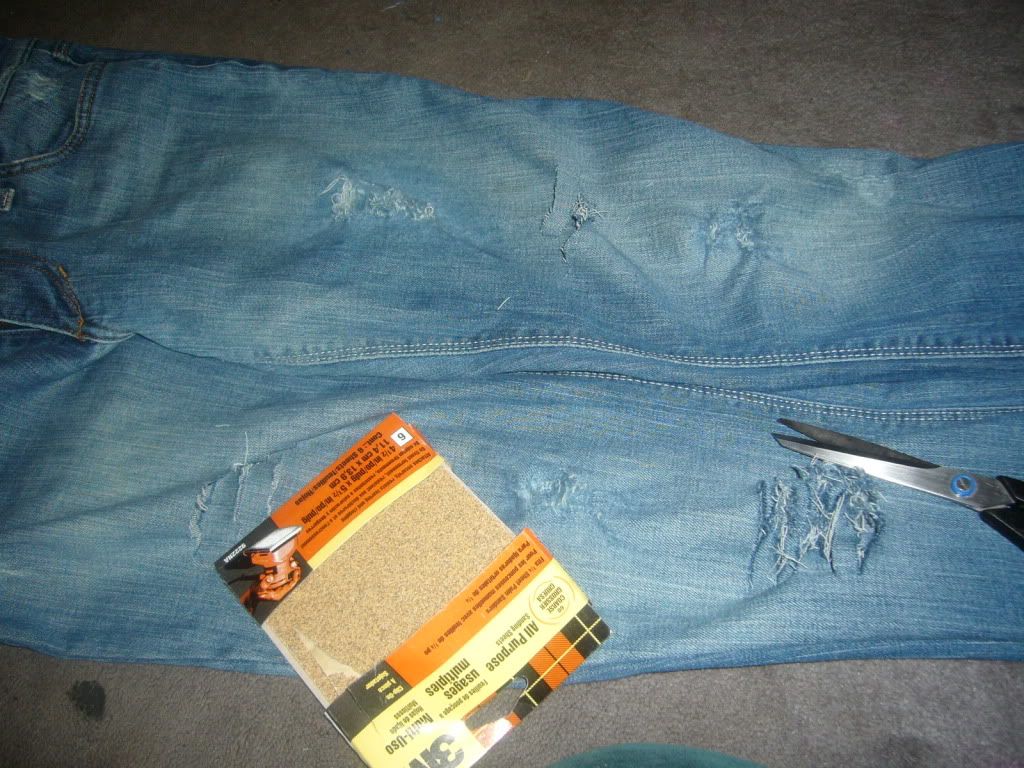
continuously jams of course.) First, cut the jeans (horizontally) in the areas you want distressed. Keep in mind the idea here is less is more with this look.


Next, turn the jeans inside out, grab some heavy grit sand paper and get the rubbing. Definitely turn the jeans inside out for this process or else you'll ruin the part of the jean that's not being distressed. This takes alot of vigorous back and forth but when done right, it gives the perfect natural distressed look.
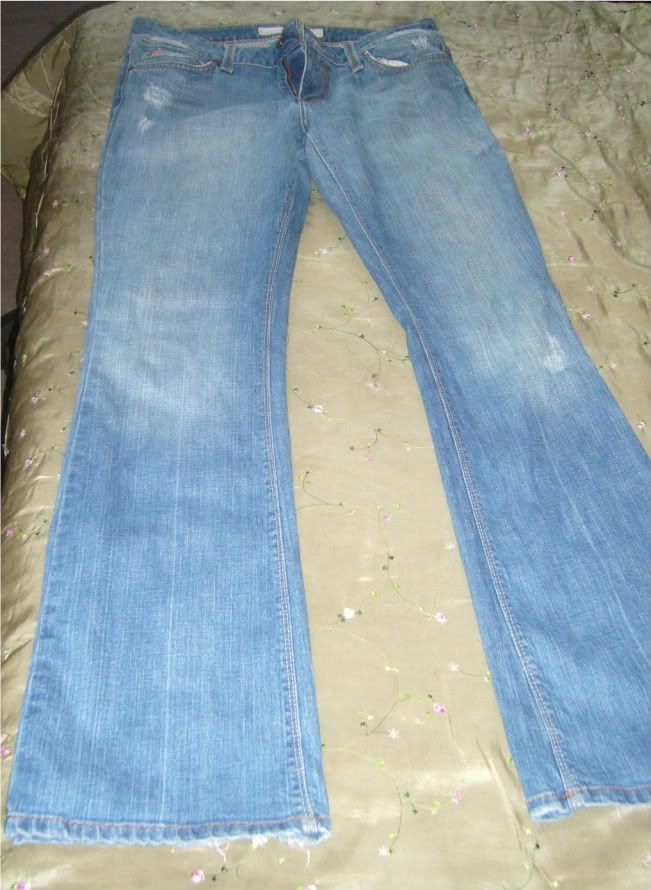
Step: 6 Throw those jammies in the wash (twice will probably do the trick and cause the threads to unravel even more.)
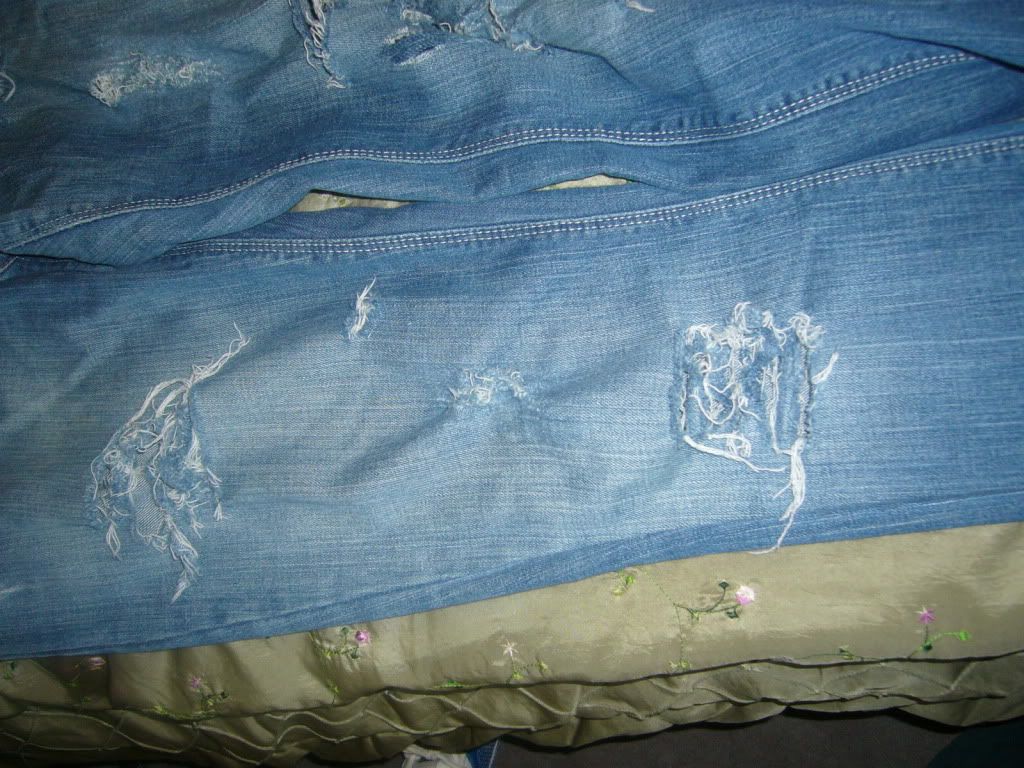
After 1 wash cycle
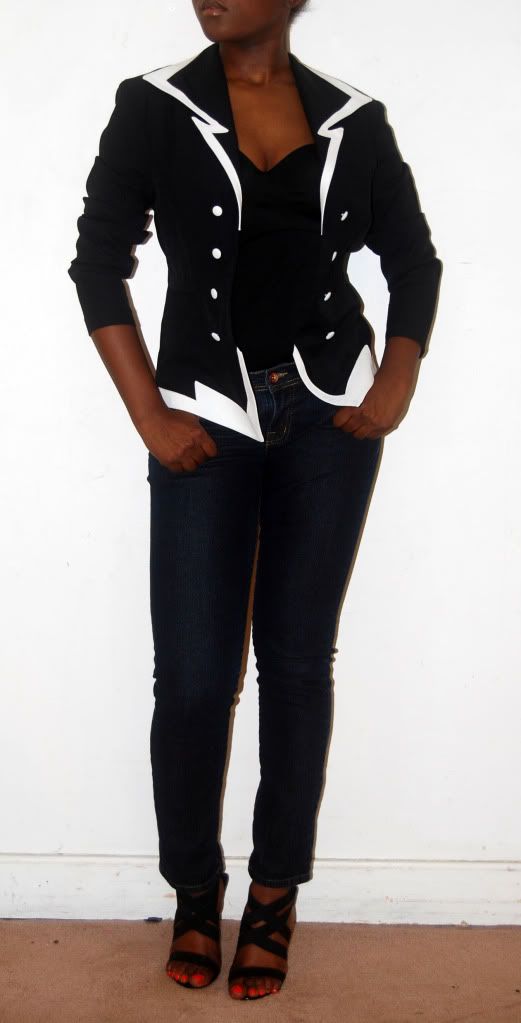
Now cuff em so they hit right above the ankle. They'll work perfectly with a nice peep toe shoe and...Fini!

After

Here's what I spent:

Jeans, Joe jeans from the thrift = $5.50

Sand paper= $2.00

Total cost: $7.50

top